Nissan Note Climate Control Backlight Repair Guide
In this guide, we’ll walk you through the process of replacing the backlight bulbs for the climate control knobs of a 2012 Nissan Note (E11). While accessing the bulbs is straightforward, replacing them does require some basic soldering skills. Finding an exact replacement for the original bulbs may be challenging, but there are suitable alternatives available.
Materials Needed:
- Replacement bulbs: I used the AT611-5V BiPin 3.8x9mm 5V 115mA miniature incandescent bulbs, which are available from suppliers like Starelec Oy.
- Soldering tools: Soldering iron, solder, and desoldering tools if necessary.
- Small screwdriver: For panel removal.
- Tweezers or pliers: To handle small components.
- Super glue (optional): For securing the light diffusers.
Step-by-Step Process:
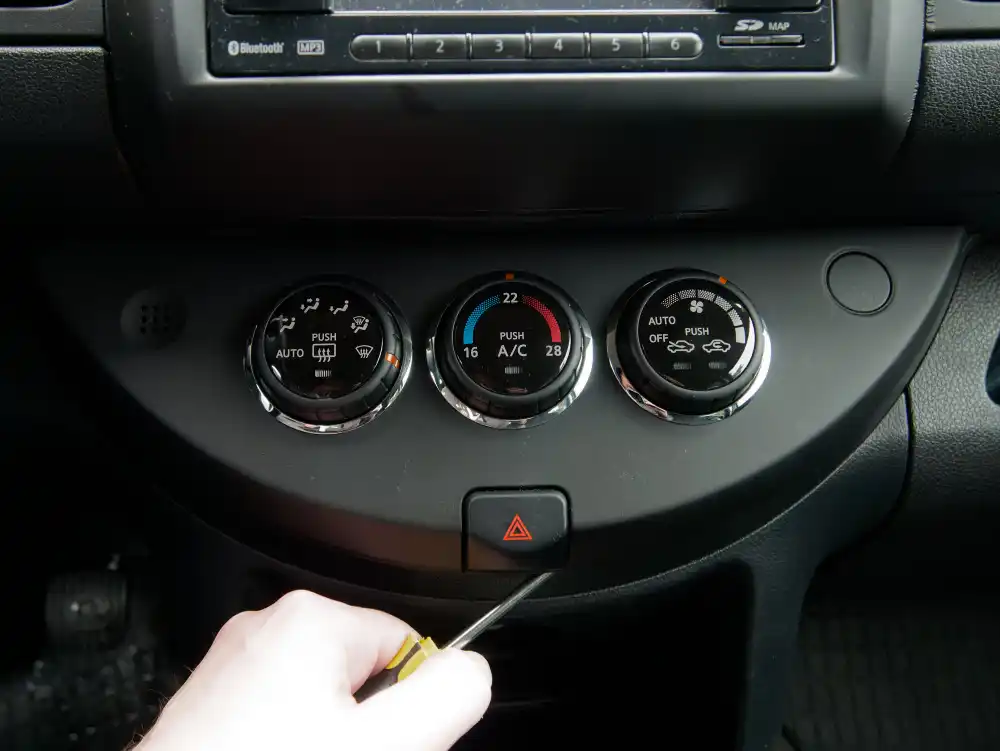
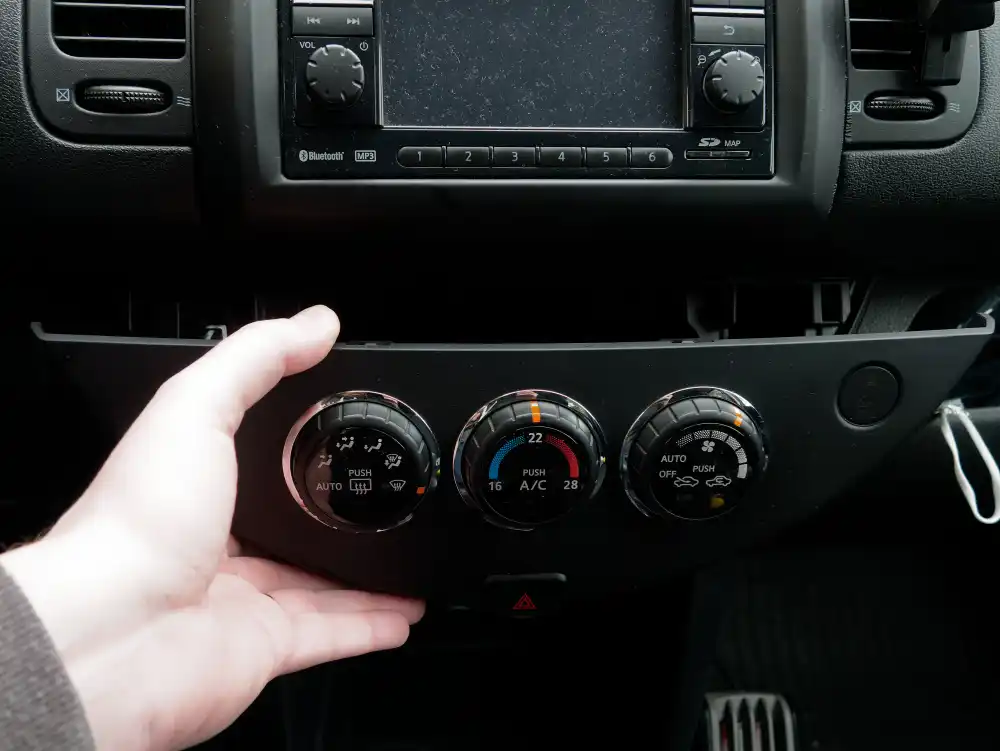
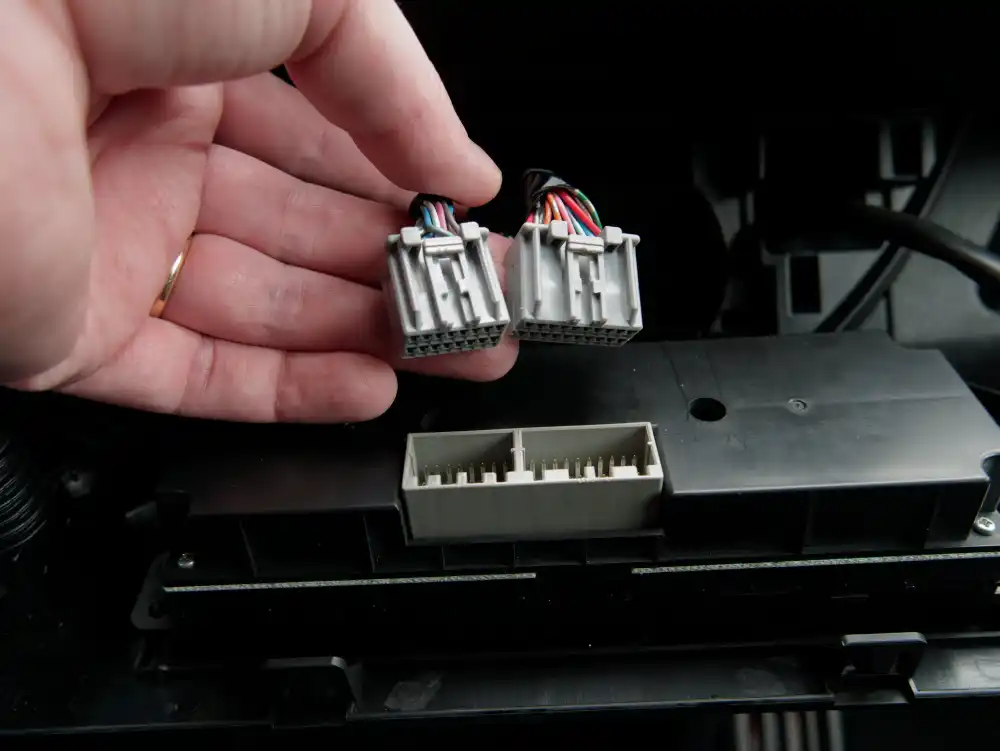
1. Remove the Control Panel:
- Carefully pry off the climate control panel using a small screwdriver.
- Pull the panel out gently and disconnect the two central cables attached to the back.
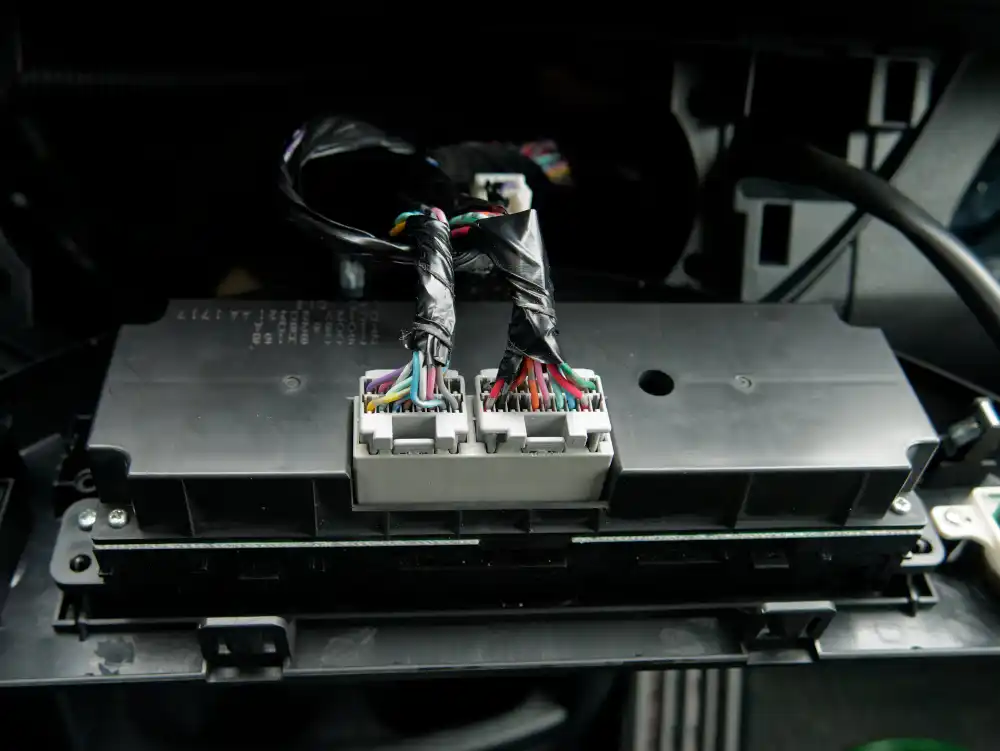
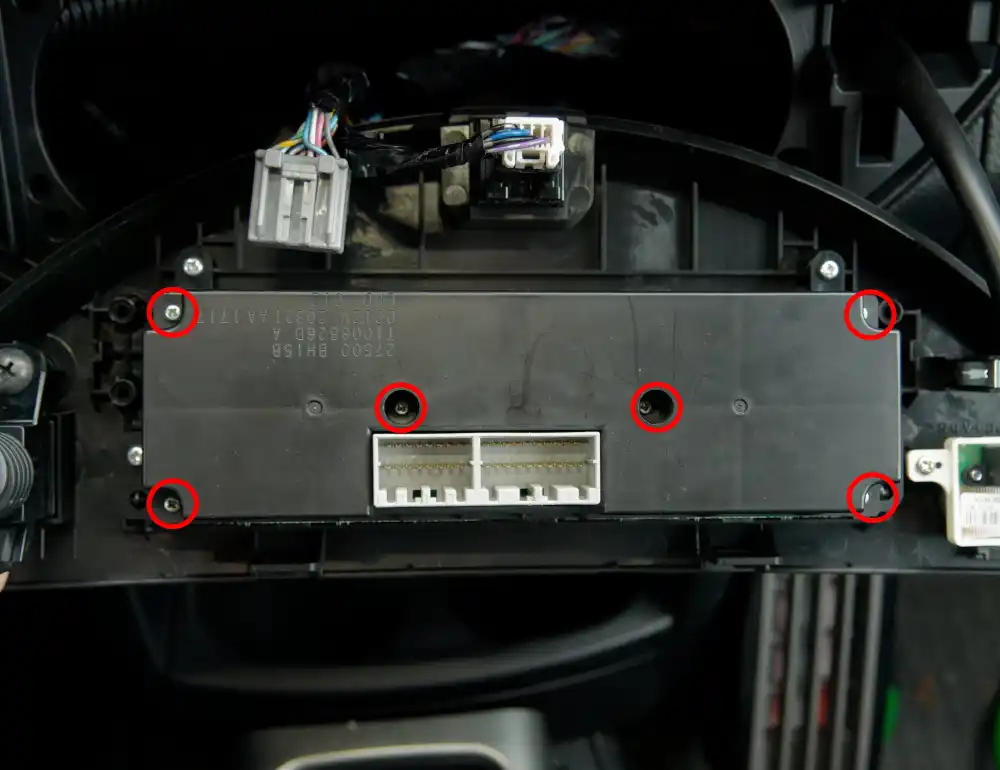
2. Access the Circuit Board:
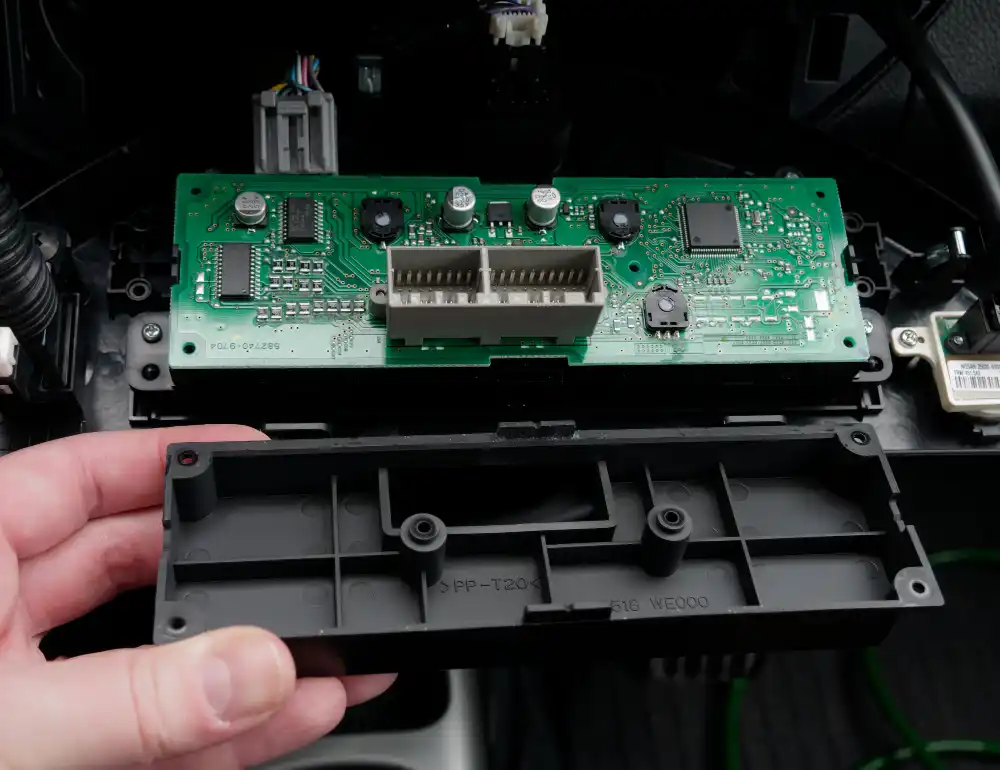
- Unscrew the six screws securing the back casing of the panel.
- Once the casing is removed, carefully lift out the circuit board.
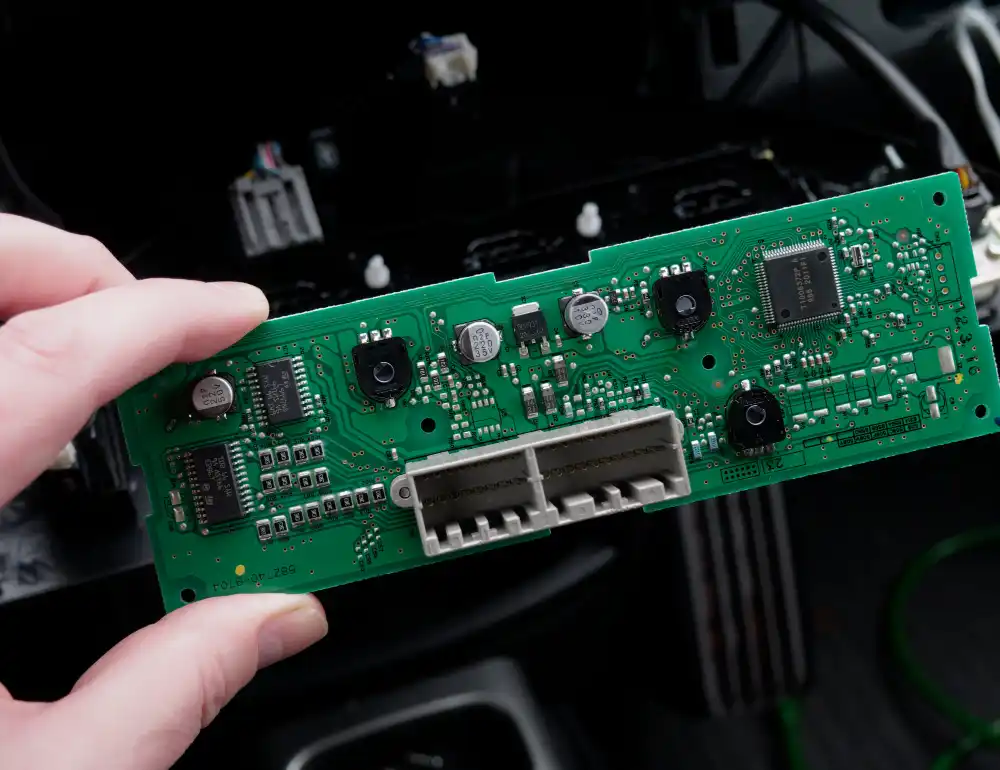
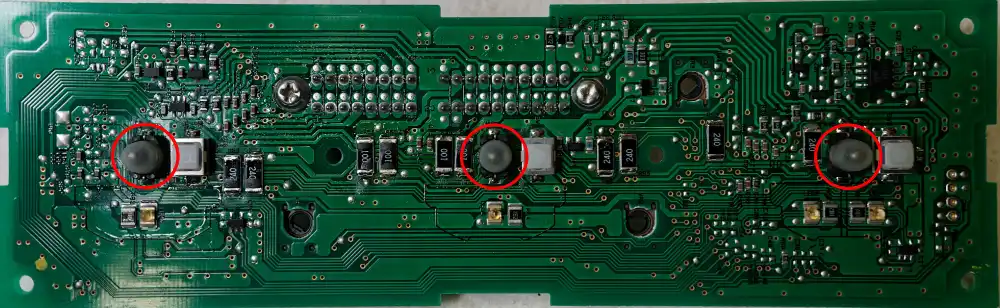
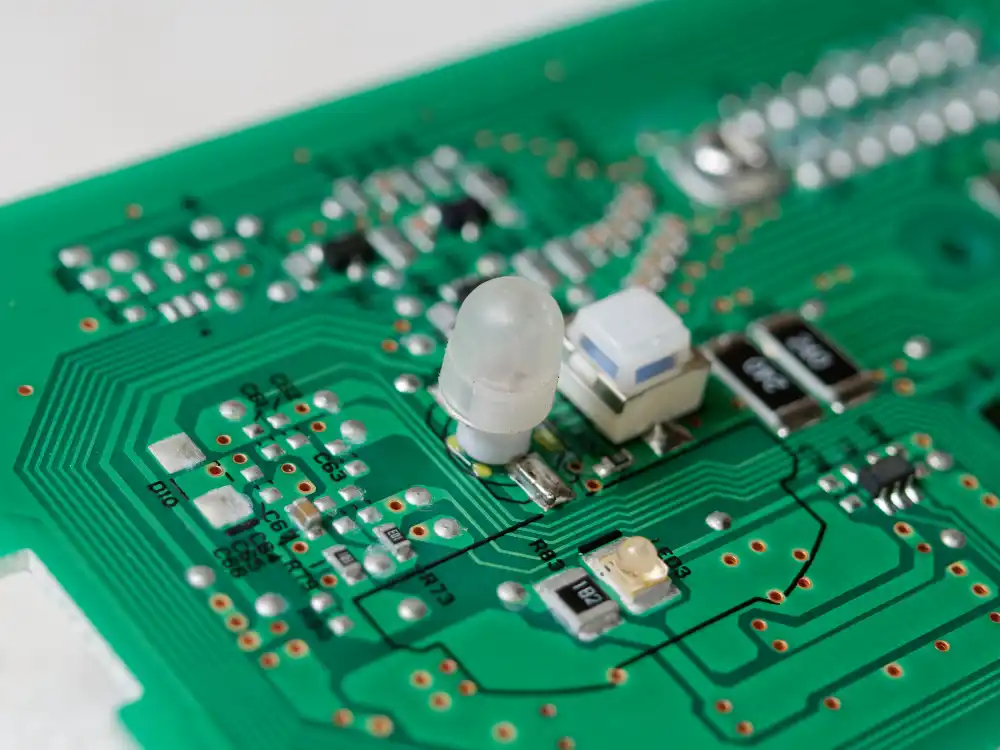
3. Remove the Old Bulbs:
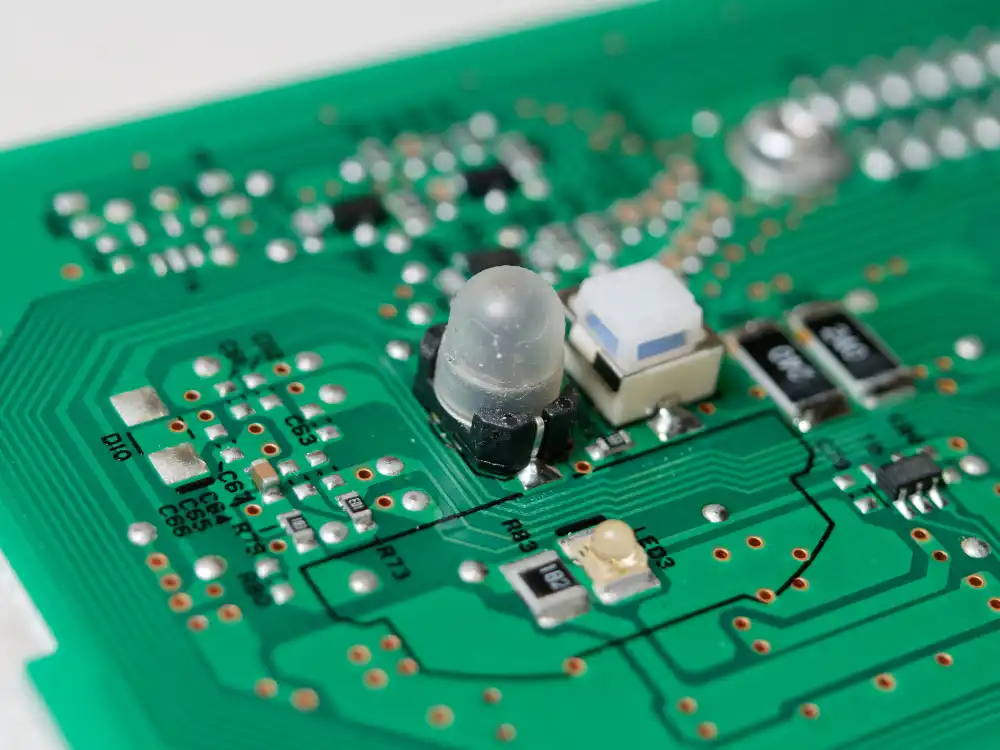
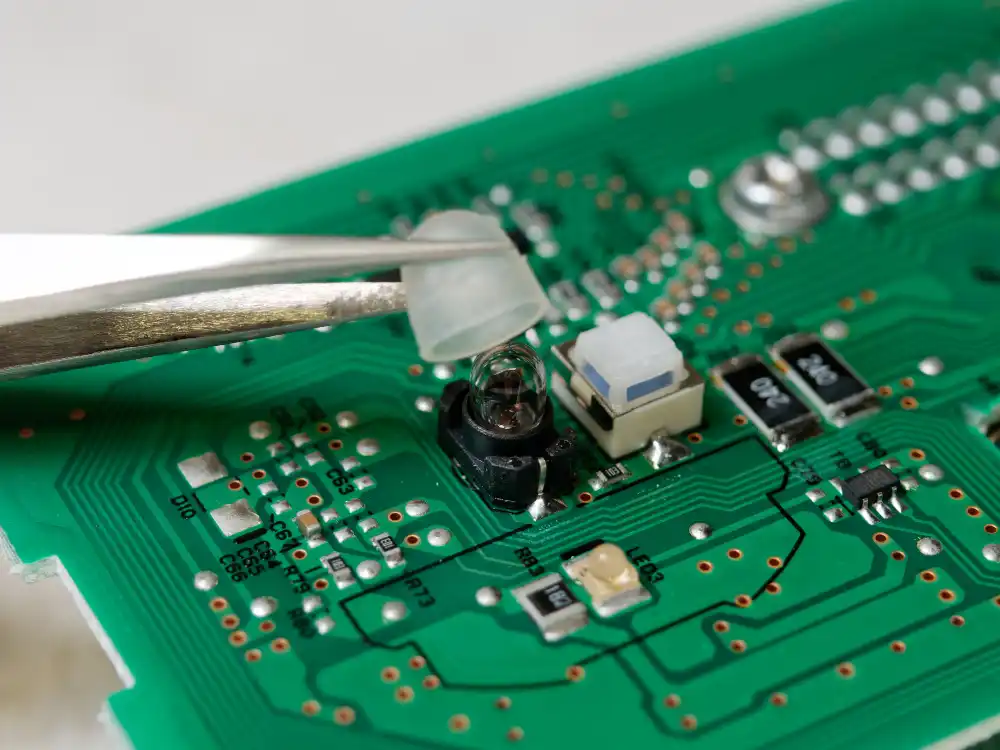
- On the circuit board, you’ll find three small incandescent bulbs, each covered by a rubber light diffuser. Set the diffusers aside for reuse.
- The original bulbs are surface-mounted, meaning their legs rest on the surface of the board rather than going through it. Use the soldering iron to heat each leg of the bulb while gently lifting it with tweezers or pliers.
- Repeat the process for all three bulbs.
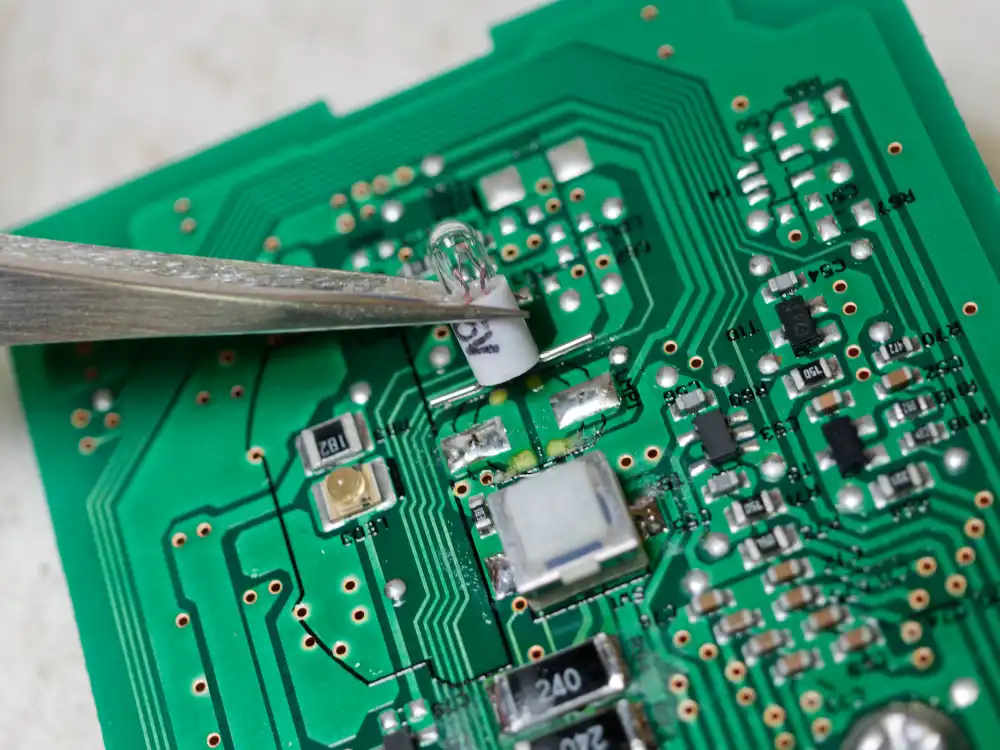
4. Install the New Bulbs:
- Bend the legs of the replacement bulbs sideways to match the orientation of the original bulbs.
- Solder the new bulbs onto the circuit board, ensuring a secure connection.
- The new bulbs may be slightly smaller than the originals, causing the light diffusers to fit loosely. You can use a small amount of super glue to secure them in place if necessary.

5. Check for Other Issues:
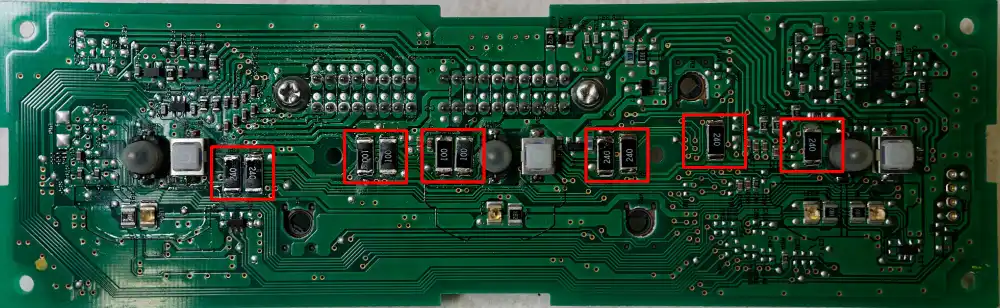
- While the circuit board is accessible, inspect the large resistors for any cracked solder joints. In this case, I found some damaged solder joints, which I resoldered to ensure proper functionality.
6. Reassemble the Panel:
- Reconnect the two cables to the circuit board.
- Turn on the car’s headlights and verify that the new bulbs are functioning correctly.
- If everything is working as expected, disconnect the cables, place the circuit board back into the front panel, and screw the back casing in place.
- Finally, reinstall the control panel into the dashboard and perform one last check of the lights.

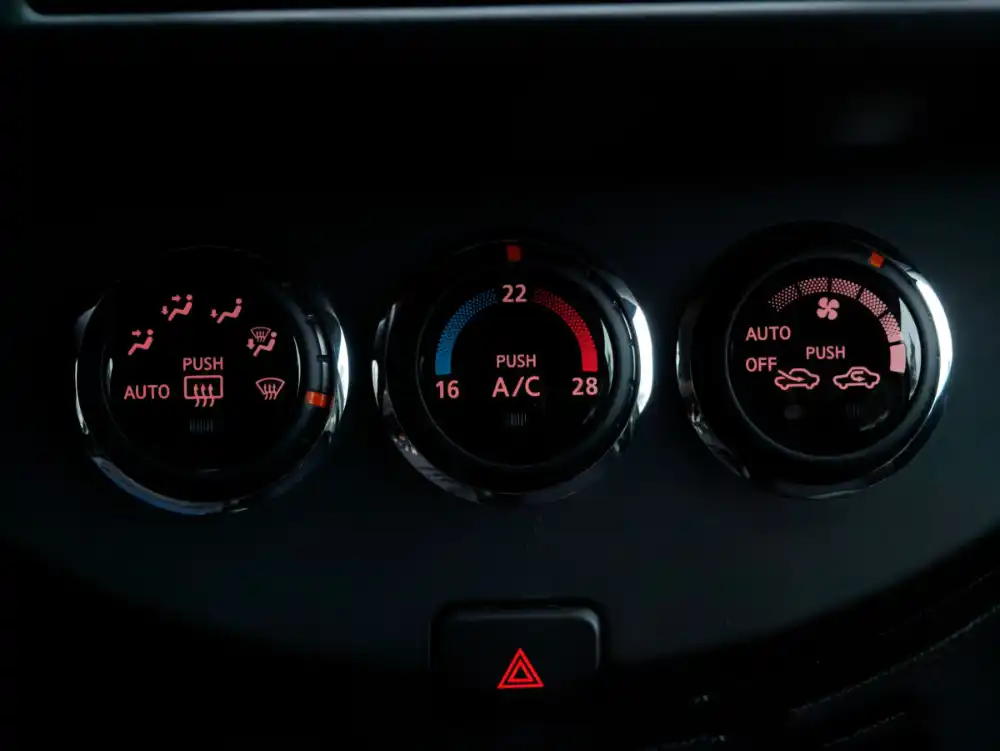
This repair process should restore the climate control backlights to full functionality, making it easier to see and use the controls at night.